Logging in to Update a Calendar
Calendar-specific passwords allow direct login through either the table type or dynamic calendars.

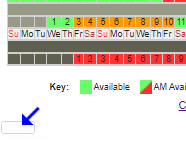
password box location
The password box on the table type calendars is the pale or even invisible rectangle on the left below the calendar. On wider displays it may be a bit further to the left. It might be a bit tricky to locate at first but you'll be able to find it quickly after a short while. After entering the correct password, confirm by pressing enter complete the login procedure.
On the dynamic calendars, clicking the logo displays the calendar key, the log-in box is invisible until you slightly drag the logo. Simply enter the password for that calendar then confirm by pressing enter complete the login procedure.
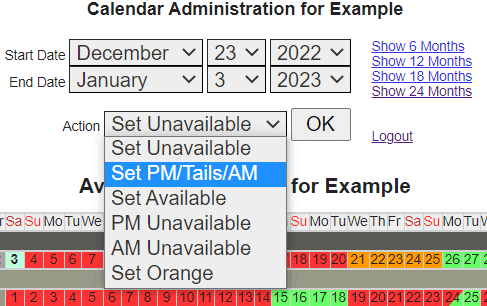
When logged-in, a Calendar Administration Control Panel is displayed along with a table style calendar. To edit dates on the calendar: Set a start date and an end date then select an 'action' to apply to the chosen dates. Hit OK to complete the update. The result will be visible immediately on the calendar.
Take care when entering the password. Multiple incorrect attempts to enter an incorrect password will result in access being blocked for a time.
(This is only a static screenshot.)

The admin control panel
The actions that can be applied are as follows...
If you only want to alter a single day, you only need to enter the date as the Start Date, you can leave the End Date set to an earlier date. When you do this a red warning message will appear to show only one date was changed, that's fine, it merely confirms that your one-day-change was successful.
The Show n Months links seen on Administration Control Panel are there to allow you (the calendar administrator) to see more or fewer months on your screen. They do not affect how the calendar is displayed to other viewers. See the FAQs. for how to adjust the number of months shown to viewers.
To help prevent possible unpleasant mistakes whilst updating calendars the maximum period that can be blocked-in in a single action is two calendar months. So if you need to block in three or four months you will need to do it in two actions. This process would of course be very slow if you needed to change all, or most, of the future dates from green to red (or orange). Don't worry, this can be done with just two clicks in the Calendar Management tools.


